Tutorial 4 of 6
~5 minControl a device
Flip a relay or LED, or set a value, straight from the dashboard using Blynk-style virtual pins.
- 1
Add a control widget
On the Dashboard → Add widget, choose a Control type: Button (momentary), Switch (toggle), Slider (value) or Terminal (text).
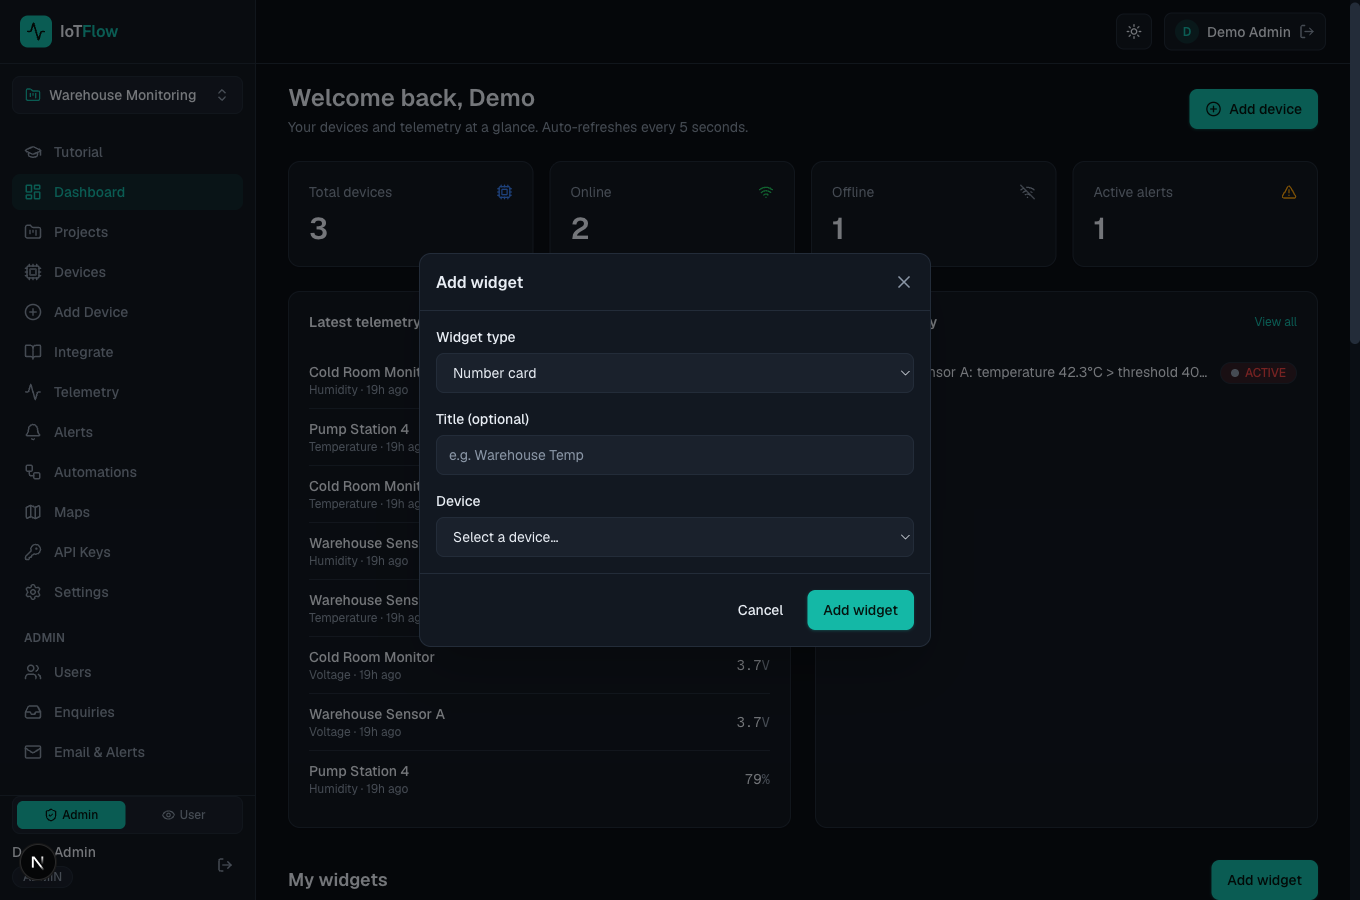
Control widgets live in the same Add widget dialog. - 2
Choose a virtual pin
Give the control a virtual pin name — e.g. V1, relay or pump. This is the key your device listens on. For a slider, set the min and max.
- 3
Make your device react
Your device receives commands on MQTT topic devices/<id>/down, or HTTP-only devices poll GET /api/device/state. Act on the {pin, value} message — the equivalent of Blynk’s BLYNK_WRITE.
void onCommand(const String& pin, float value, const String& text) { if (pin == "V1") digitalWrite(RELAY_PIN, value > 0 ? HIGH : LOW); } - 4
Python devices react the same way
With the iotflow package, register a command handler and run — over MQTT it fires in real time; over plain HTTP, iot.run() polls for you.
# pip install "iotflow[mqtt]" from iotflow import IoTFlow iot = IoTFlow(token="dev_YOUR_DEVICE_TOKEN", device_id="your-device-id", mqtt_host="BROKER_HOST", mqtt_port=1883) @iot.on_command def handle(pin, value, text): if pin == "relay": print("relay ->", value) # drive a GPIO here iot.loop_forever() - 5
Toggle from the dashboard
Flip the Switch or drag the Slider — the command is persisted and delivered to your device instantly (and it also fires a COMMAND automation you can hook into n8n).
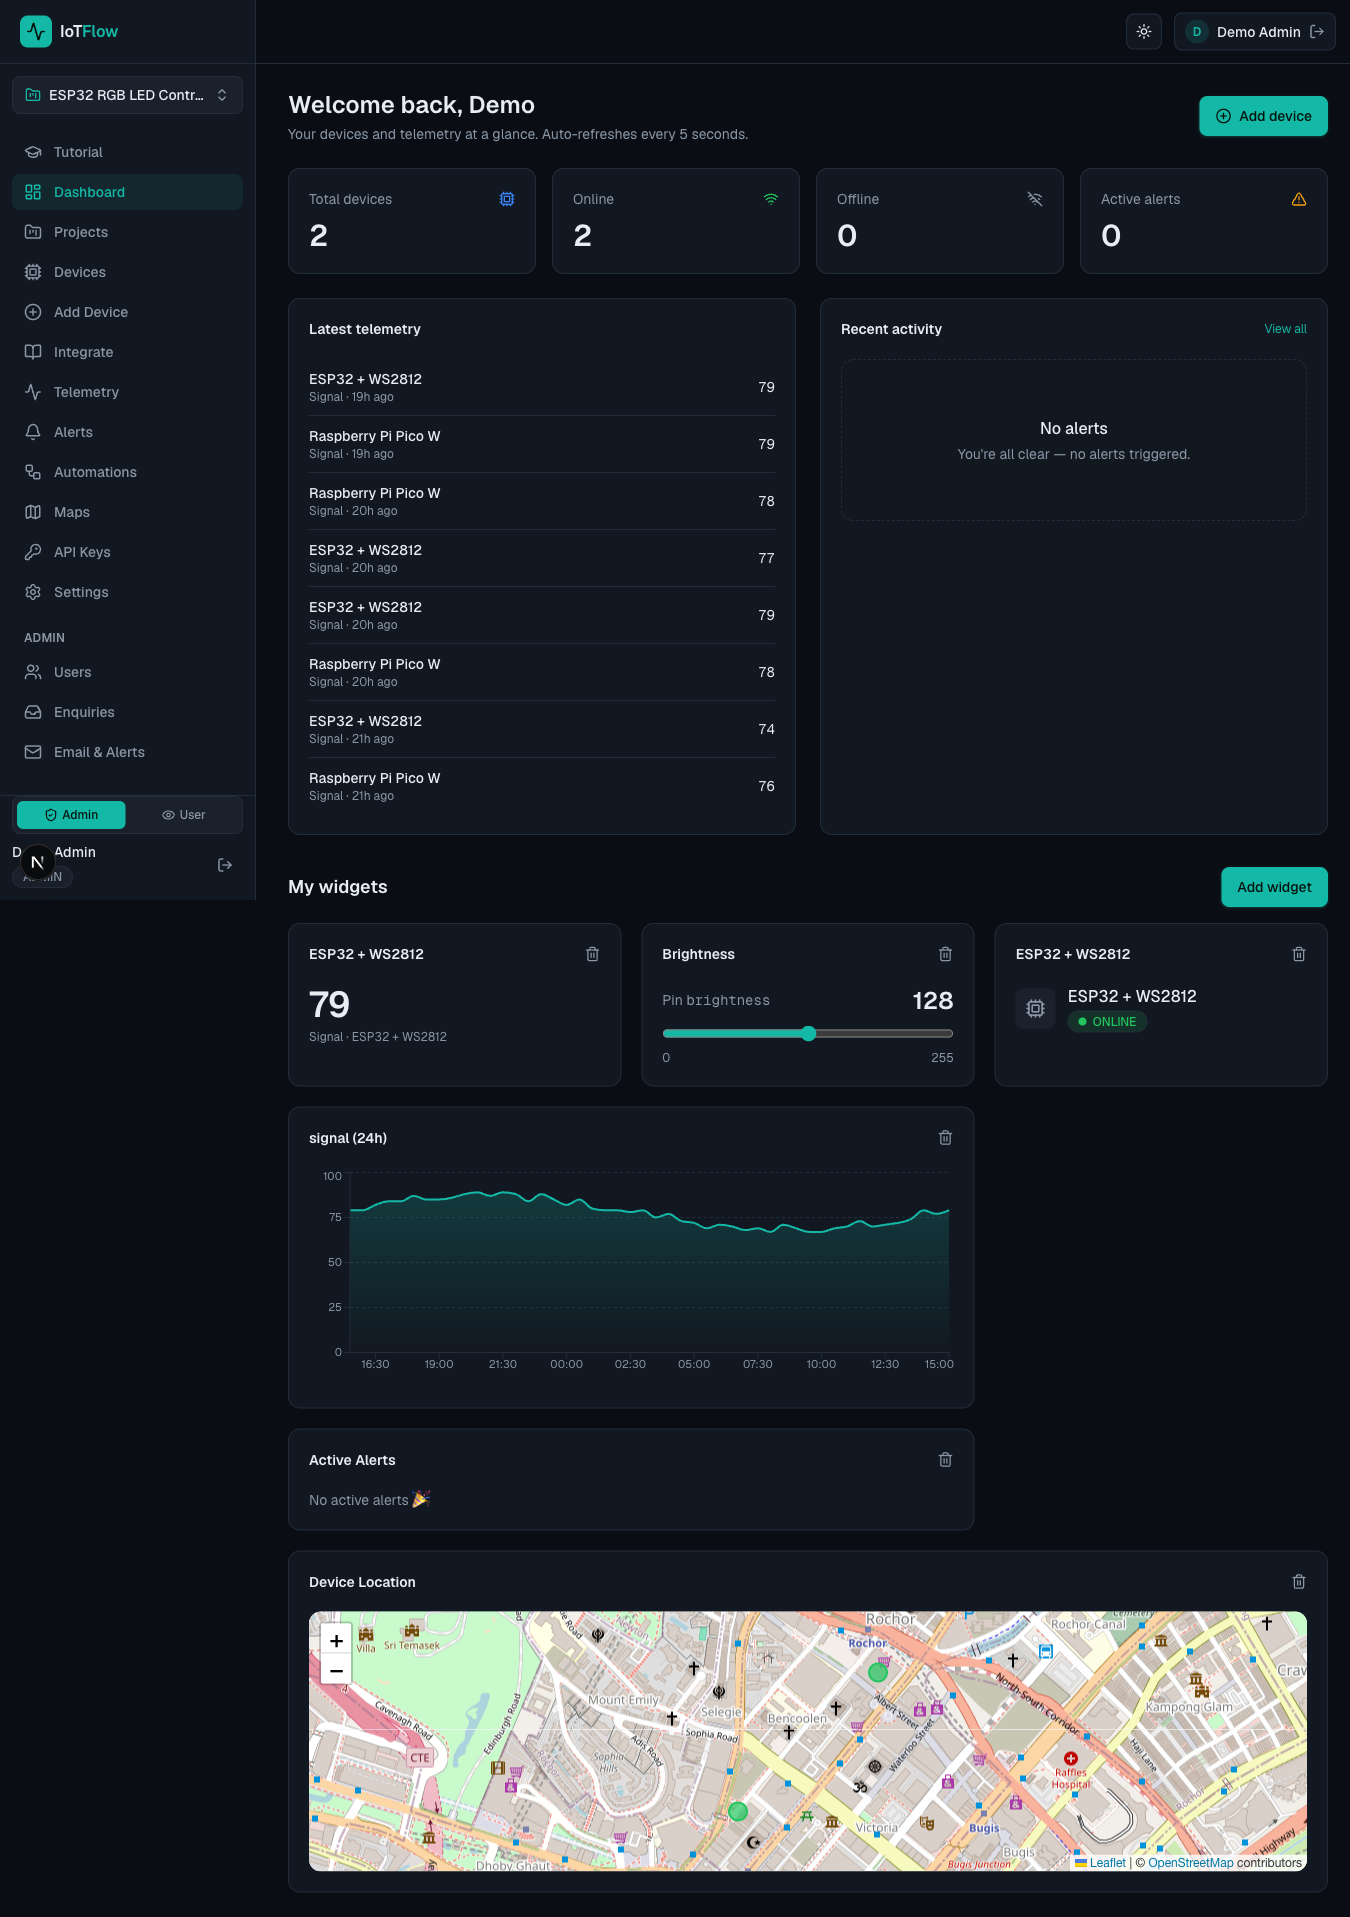
Switch and Slider control widgets on a live dashboard.