Tutorial 7 of 7
~6 minCreate an API key and set up alerts
Create an account-level API key, send telemetry with it, and get an alert the moment a reading crosses a threshold — plus how to get the mobile app.
- 1
Make sure your account is an Admin
Creating API keys and alert rules needs the Admin role. If the API Keys page says “Ask an administrator to create a key”, ask your IoTFlow administrator to set your role to Admin under Admin → Users — it applies within about 30 seconds, no sign-out needed. Keep the Admin | User toggle in the top bar on Admin, or the create buttons stay hidden.
- 2
Do you need an API key at all?
Every device already has its own device token (dev_…) on its device page — that’s all one board needs. An API key (iot_…) is one key for all your devices: handy for a gateway or script that reports for several of them. With an API key you include the device’s Device ID in every message.
- 3
Create the API key
In the sidebar, open API Keys and click Create API key (top right). Give it a name you’ll recognise later, e.g. “Classroom sensors”, and click Create.
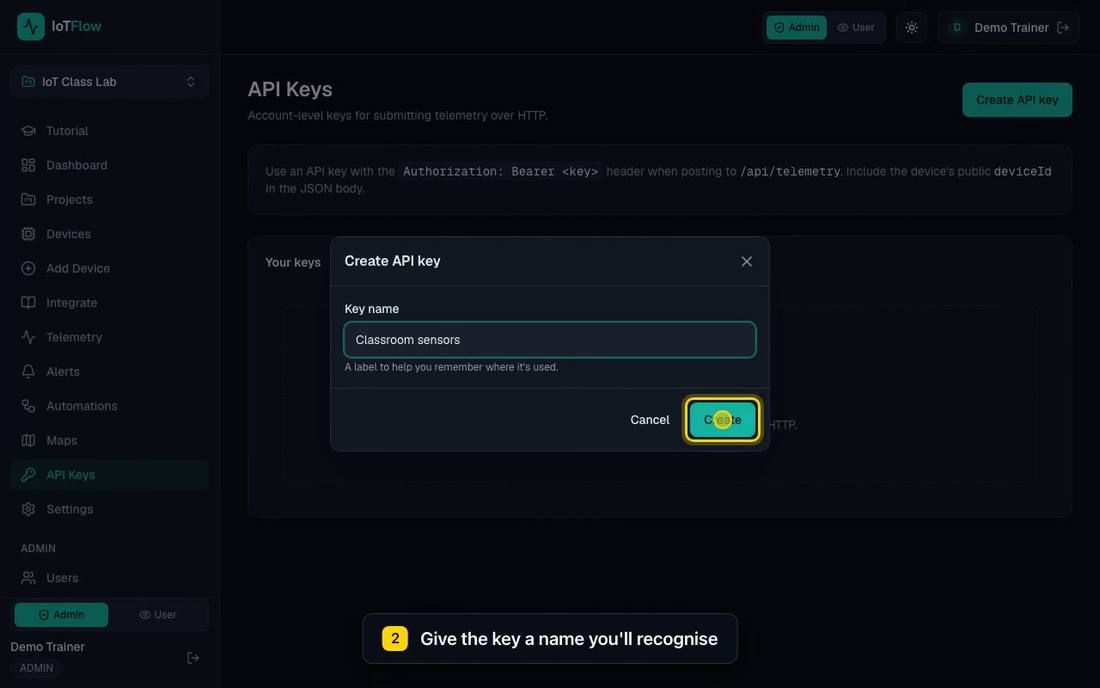
Naming a new API key. - 4
Copy it now — it is shown only once
Click Copy and store the key somewhere safe (a password manager or your script’s config). Only its prefix is kept, so if you lose it, revoke it with the bin icon and create a new one. Anything using a revoked key stops sending immediately.
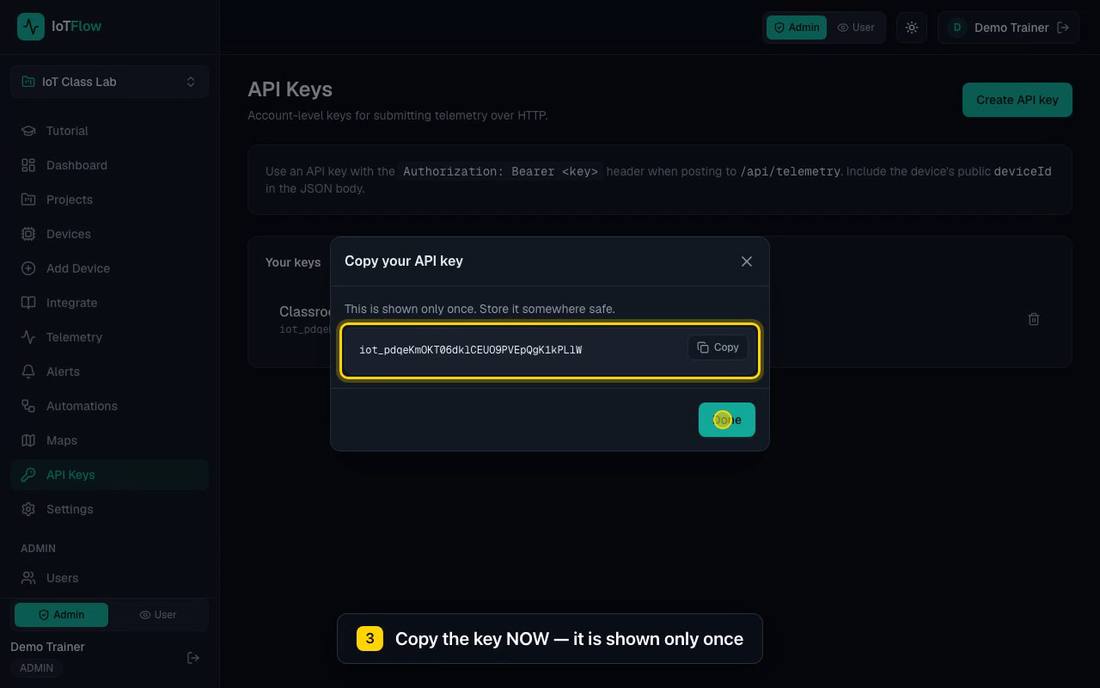
The full key appears once, right after you create it. - 5
Send telemetry with the key
POST to /api/telemetry with the key as a Bearer token. Put the device’s Device ID (shown on its device page) and your readings in the JSON body. A 201 response means it was stored; every number becomes its own metric.
curl -X POST https://YOUR-HOST/api/telemetry \ -H "Authorization: Bearer iot_YOUR_API_KEY" \ -H "Content-Type: application/json" \ -d '{"deviceId": "YOUR_DEVICE_ID", "temperature": 27.4, "humidity": 63}' # Python import requests requests.post("https://YOUR-HOST/api/telemetry", headers={"Authorization": "Bearer iot_YOUR_API_KEY"}, json={"deviceId": "YOUR_DEVICE_ID", "temperature": 27.4, "humidity": 63}) - 6
Create an alert rule
Open Alerts → Create rule. Name it, pick the device, choose a condition (greater than, less than, ≥, ≤, equals, or device offline), then the metric and threshold — e.g. temperature > 30. The metric list is built from data the device has already sent, so send one reading first. The Alerts page only lists devices in the current project.
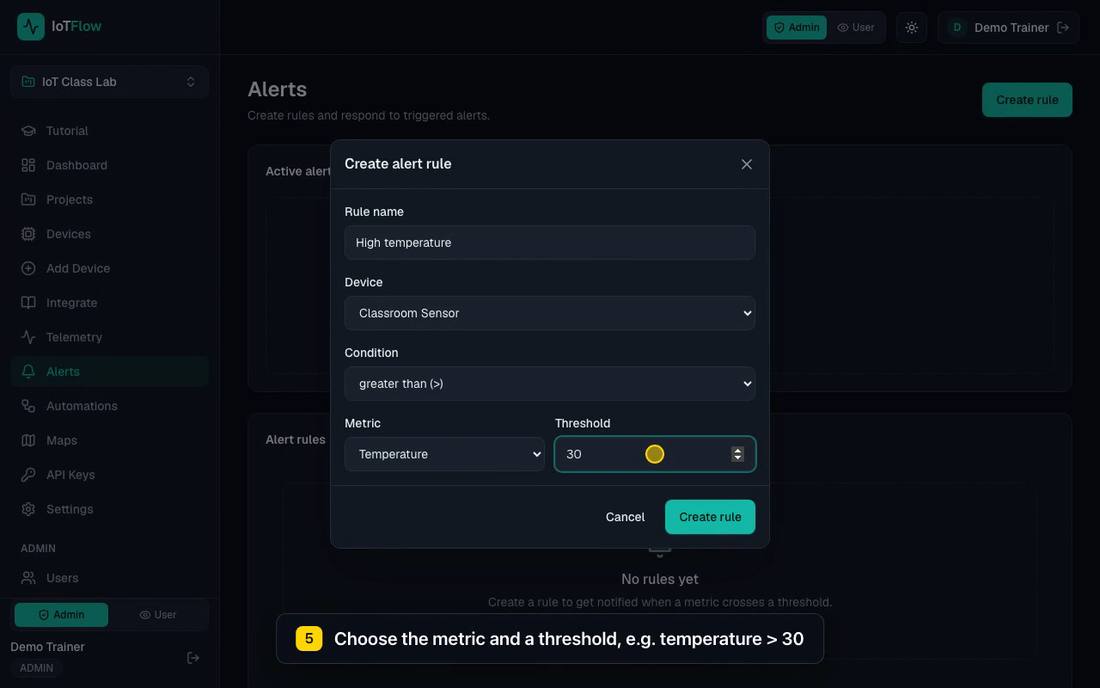
A rule that fires when temperature goes above 30. - 7
Trigger it, then resolve it
Send a reading above the threshold (e.g. temperature 34.5). Within seconds the alert appears under Active alerts and in the mobile app. Click Resolve once it’s handled; while an alert is active the same rule won’t raise duplicates. To forward alerts to Telegram, Slack, email or a sheet, add an Automation with the Alert trigger (Tutorial 5).
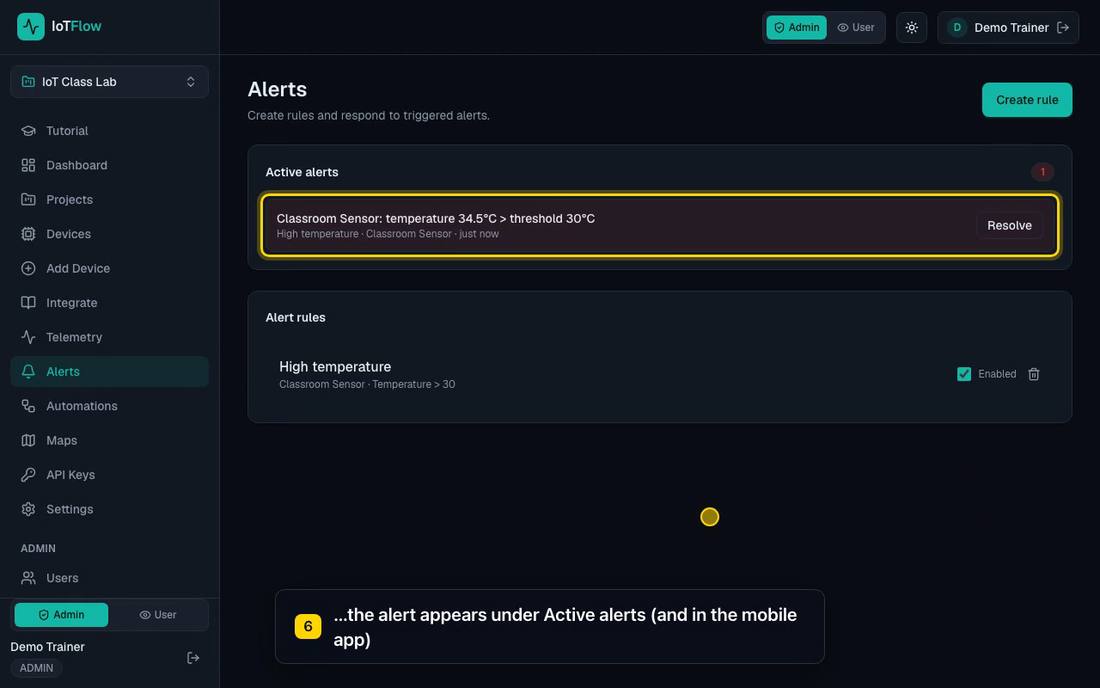
The triggered alert, ready to resolve. - 8
Get the mobile app
iPhone / iPad: search “IoTFlow” on the App Store (apps.apple.com/us/app/iotflow/id6781005693). Android is in closed testing — contact us with your Gmail to join as a tester. Sign in with the same email and password as the website; if you registered with Google, set a password first via Forgot password. Dashboards, controls, devices and alerts are all there.