Build a Smart Farm: Auto-Irrigation with ESP32, a Soil Sensor & n8n
Keep your crops watered automatically. Read soil moisture on an ESP32, stream it to IoTFlow over MQTT, and let an n8n flow switch the pump when the soil gets dry.
Smart Farm: Auto-Irrigation
Watering plants by hand is easy to forget. In this project we build a self-watering garden bed: an ESP32 reads a capacitive soil-moisture sensor and publishes the value to IoTFlow, and an n8n flow turns a pump relay on when the soil dries out.
What you need
- ESP32 dev board
- Capacitive soil moisture sensor
- 5V relay + small water pump
- IoTFlow account (create a device, copy its token)
Device code (ESP32)
Report the reading with virtualWrite, and react to the pump command:
iot.setDevice("uno-soil-01", "dev_YOUR_TOKEN");
iot.onCommand([](const String& pin, float v, const String&){
  if (pin == "pump") digitalWrite(RELAY, v > 0 ? HIGH : LOW);
});
// in loop():
iot.virtualWrite("soil", readSoil());   // 0 (wet) .. 1023 (dry)
Bind a Gauge widget to soil and a Switch widget to pump on your dashboard so you can watch and override it anytime.
The n8n workflow
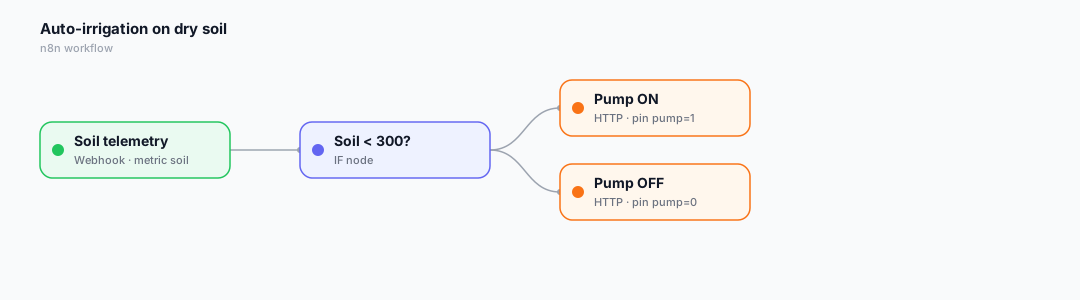
Here is the low-code automation that ties it together. In IoTFlow, every device event (telemetry, alert, command) can be forwarded to an n8n Webhook, and n8n calls back into the platform to control the device.
- The Webhook receives every soil reading (TELEMETRY, metric = soil).
- An IF node checks whether soil < 300 (dry).
- If dry, an HTTP Request sets pump = 1; otherwise pump = 0.
Wire it up in 3 steps
- In n8n, add a Webhook node, activate it and copy the Production URL.
- In IoTFlow → Automations → New automation, pick the event and paste the URL.
- Click Test, then let real device data trigger it automatically.
Tip: bind a Switch or Slider widget to the same virtual pin so you can also control the device by hand from the web or mobile app.
Happy building! 🚀
Reviews
Leave a review